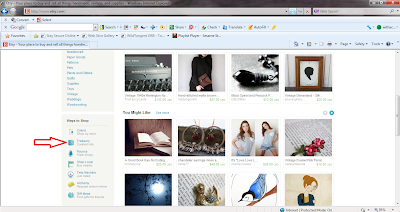
On the Etsy main page under the “Ways to Shop” section, click on Treasury.
Step two:
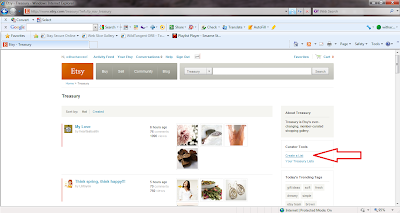
Once you’ve reached the Treasury page, under Curator Tools, click on Create a List.
Step three:
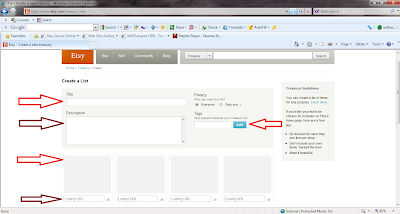
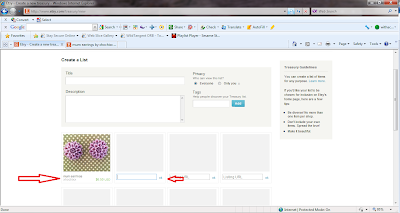
Start creating your list! Enter your title, description, and tags. Don’t forget the tags, they are just as important for searching Treasuries as listings. Also on this page you will see grey squares with a small box underneath. It will say “Listing URL.”
Step four:
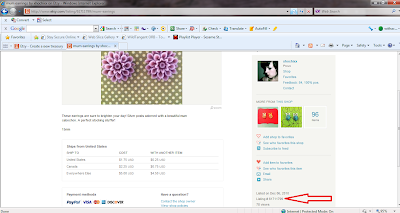
Open a new window and go to the page of the item you would like to use. Scroll down and on the right have side of the page you’ll see the Listed Date, Listing # and number of views. Copy the listing #, only copy the numbers!
Step five:
Paste the listing number into the rectangle box under the grey square and click, “OK” and your image should appear. After you fill your boxes you can do some rearranging, but watch out it can get a little tricky.
Step six:
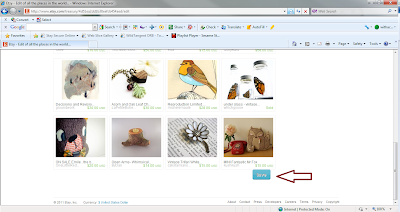
Save and Share! Make sure all your items are where you want them placed. Complete your title, description, and tags like I mentioned above and just click Save! You’re done with your lovely new treasury!
I've made a bunch of treasuries. For a while I was going crazy over it. I got one of the front page of Etsy and I just had to try for another! If you want to see more I made you can see more examples here. Feel free to ask me any questions you need. I'm happy to help with any problems that I can with this. It's pretty simple but it's also creative and fun. Go try it! I'd love to see what you come up with! ^_^

Woo hoo! thanks so much for helping me figure it out:) I'm such a noob >.<
ReplyDelete