Showing posts with label Valentine's Day. Show all posts

Monday, February 14, 2011

Spread the Love.

Happy Valentine's Day Everyone!!!!


My sad little attempt at a Vday card for all the lovely people who stop by my little blog. Love you all!!!


I hope you have a great Monday!

Sunday, February 13, 2011

Valentine's Day Lunch @ In Pockets

WARNING: Photo Overload!


Yesturday we celebrated Valentine's Day together. Marc's office used to be in Historic Downtown Chandler. He used to eat lunch at this little place called In Pockets all the time, and I was super jealous, because he always raved about how good it was! Since we went there I have to tell you, it really is amazing! It's kind of has a bistro feel to it. They make great sandwhich and salads. They also do wedding pastries. It was sooo yummy!!!!!

The outside of In Pockets


Marc being himself.

Aurora playing with my lens cap.

Aurora with her chocolate and raspberry cupcake. She went on a serious sugar high after this.


After lunch I had to do some portait photos for my photography class, and of course who did I call on? My adorable family!

My Daughter, The Ham


My husband, The Man


What have you been up to this weekend?

Monday, February 7, 2011

More Cards.

Well, I know I said I was going to start a new painting today, but that didn't really happen. I did paint, sort of, I realized that Valentines Day is coming up quick, and I wanted to get some cards in the mail soon. So, I made some festive Valentine's Day cards! It was still being creative, just a way to get my juices flowing!


An nice end to a Monday!

Friday, February 4, 2011

Adventures in Craftiness: Pinprick Cards

This great little number is from the Etsy Blog. I saw this while doing my daily reads one day and had to try it for myself. I couldn't believe how easy it is! I have seen pinprick art work before, but never thought to try it myself. It's easy and pretty fun!

Head over to Etsy to get more detailed instructions!


Supplies:
Cards
Push Pin or Needle
Paper
Pencil
Cardboard
Imagenation


I think the whole idea of this is pretty self explanatory. All I did was lightly sketched my idea of the inside of my card and then I proceeded to poke holes into my design from the inside of the card. Depending on your design it can be a little time consuming, but still have!

Still a work in progress


I love how the light shines through


Here is a great pinprick artist on Etsy for some inspirational ideas!

warpeDesign


azuretoll


McIsaacArt


Happy Poking!!!

Wednesday, February 2, 2011

crafting with a kid: heart wreaths.

I always have a lot of fun making things with Aurora. Sometimes I think that I have more fun coloring with her crayons, or playing with stickers than she does. Now that she's getting older I'm glad I get to create new crafts with her.

When we went to Michael's the other day I let her pick out a Valentine's day craft of the shelf. She picked the foam heart wreaths, like mother like daughter I guess!


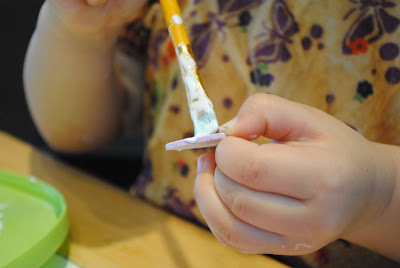
She had a blast playing with the glue, pushing on her hearts, and adding stickers. I think the active really wore her out because when I put her down for a nap she totally passed out! I'm so glad we did this.



Monday, January 31, 2011

Adventures in Craftiness: Simple Paper Hearts.

Our little palm tree we used for our Christmas tree this past year is still alive and doing very well. That’s saying a lot because I’m not good with plants. I decided that while it’s still around I was going to decorate it for different holidays. Since Valentine’s Day is coming up I decided to make some creative paper hearts for our tree. I have a ton of cards from different occasions that I hate to see just sit in a box, so I used them, as well at other scrap booking paper to create fun little decorations!

Supplies:
Scarp paper, magazines, or old cards
Floral scarp booking embellishments, buttons, and/or glitter
Scrap booking tacks (“Brads”)
Scissors
Mod Podge or your favorite adhesive
Ribbon, string, or yarn


Step One
Cut out small heart shapes that will be the center of your ornaments.
Step two
Trace a larger heart around your small heart for the outside background.


Step Three
Glue smaller heart shapes to the center of the larger heart shapes and let them dry.


Step Four
Take your tack and put it through your embellishment as well as through your glued card cut out.


Step five
Cut your ribbon to your desired length and push your tack through both ends of the ribbon. Open and fold down the ends of your tacks when you’re done.


Then presto! You have lovely heart ornaments just in time for Valentine’s Days! These would also make really great kids crafts or even bunting! Have fun and great creative!!